Marine Art and Maritime Modelmaking

Welcome to my blog, it's primary intention is to keep my existing clients up to date with the progress of their commissions, but hopefully it will prove of interest to anyone with an interest in Marine art and modelmaking
Showing posts with label modelwarships. Show all posts

Tuesday, 14 May 2013

HMS Victory, Airfix 1:100, alterations worth making to the kit, gun ports etc

In my opinion the most important alteration you can make to this kit is to thicken the hull walls around the gun ports. The injection molding process/ financial restrictions mean the ships hull is considerably thinner than it should be.
So using some styrene strip of 3.2mm x 4 mm for the lower gun deck, 2.5mm x 4mm for the next and 2mm x 4 mm for the upper gun deck, I set about thickening the hull
First of all the gun ports were sanded down to remove the poorly represented inner frames, then using a guillotine/cutter the styrene strip was cut into 8-9mm lengths and glued on the inside of the gun ports.I then  adjusted the strips looking from the outside,  positioning each piece, making sure they overlaped evenly and parallel to the edges of the gun port.
Below, 13 hours and 352 pieces of styrene later all the gun ports on both sides of the hull have been completed.


A close up shows how the hull walls now appear convincingly deeper when seen through the gun ports.

This shot shows the hulls from the inside, none of the styrene will be visible when the decks are in position, except for maybe the middle ports on the 12pdr gun deck, theses ports may need  to be hidden by a  thin sheet of styrene after the lower decks have been put in place.
The next alteration made to this kit was to prepare the keel for the copper covering. The bottom part of the central keel is cast flat with no detail.This part of the ship is not really seen when viewing the ship from above, but if viewed from a lower angle it can be seen.
 One complete packet of styrene strip 4 mm x 0.25 mm was cut into lengths between 12-15 mm long.The flat part of the keel was tiled with this so that it appeared uniform. This took 3 hours and 15 minutes for both halves of the hull, leaving it ready for the next stage, covering in copper foil.


 The next task was to deal with the moulded wood grain on the outside of the hull. Initially I thought I would leave it ,but after some contemplation, I decided the out of scale wood grain effect upon it  would really detract from the overall look of the finished model.
The only reason I could think of for not removing the wood grain effect was that is was a time consuming, boring, messy, laborious task that I didnt really want to do.

 With this in mind, armed with a piece of 180 sandpaper I decided to take on the dreaded laminate floor style wood grain.
On the left of the stairs the wood grain as it was originally, on the right of the stairs the rubbed down hull. The result is pleasing, but great effort was required not to remove any detail around the gun ports or other sharp edges that I wanted to keep.
After 8.5 hours both sides of the hull were rubbed down to an extent where the wood grain effect exists only as a light shadow. The seam lines on the top of the hull were also removed with a scalpel and sand paper.

The last major alteration to the hull I have planned is concerning the windows in the stern of the ship.The glazing bars in the windows look cheap like UVPC, not suitable for Georgian glass so with a small square needle file the windows had their bars filed down to make them thinner.

The three  columns of windows on the left hand side of the picture have been filed down, compare them with the other windows which are untouched. The thinner rubbed down glazing bars have a delicacy and irregularity that adds greatly to the appearance of the model.

I was going to cut the rear gun ports out, but unfortunately the holes do not line up with the lower deck, they appear to be position lower than they should be ? So making the necessary alterations would become quite time consuming job and are not in the budget for this project.

The windows at the side of the stern were also given the same treatment.The half on the left has been filed down and awaits cleaning up,the half on the right is as it comes in the box. This photo shows clearly shows how over sized the glazing bars are.

Below the photo shows the stern cleaned up and ready for painting.

The windows were cleaned by running the edge of a scalpel along the glazing bars to remove the "fluffy bits" ,then they were brushed with a stiff brush to get rid of any bits, leaving a finer and  increasingly delicate looking stern.

Wednesday, 20 February 2013

HMS Victory Airfix 1:100, 32,24,12 pounders construction

I have started putting together the Guns on HMS Victory, first of all I soaked the sprues in warm soapy water for 5-10 minutes and then set them aside and allowed them to dry thoroughly.

Next I removed 60 gun barrel halves(parts 14 and 15), trimmed off the plastic that attached the guns to the sprues and glued the two halves of the barrels together. With each gun I took a bit of time to ensure both sides of the barrels are aligned correctly, and  I was careful not to apply to much  glue, however the barrels still require scraping with a scalpel along the seam lines when dry.
After this I looked at the gun carriages, removed the 5 pieces, trimmed them and assembled them,I made sure the sides were square and that the gun barrels sat in the carriages at the same angle.
 The 32 pdrs barrels and carriages are the same size in this kit as the 24 pdrs, this is just a result of rationalization in the kit design,but in 1:100 scale the size difference is barely noticeable.
After 6.5 hours work, all 30 of the 32 pdrs and their carriages have been assembled, the seam lines on the barrels have been scraped with a sharp scalpel and the muzzles have been filed with a circular file.

Next, I repeated the process for the 30 x 24 pdr guns, this took only 5.5 hours as the process of assembly was refined and became increasingly efficient,I also stopped scraping the seam lines on the barrel on the part that rests upon the gun carriage as they will not be seen. Below the 60 32 and 24 pdr guns assembled.


Below in a close up of one of the above guns, you can see how I have drilled out a hole in the plastic on the breech of the gun to thread the restraining rope through. I have only done one, until I work out how visible this part of the model will be when assembled,thers no point wasting time putting in details that nobody will ever see !
 However some of the visible 12 pdrs on the deck will need super detailing,ropes, blocks and tackle etc.

Next I assembled the 24 x long barreled 12 pdrs and the 20 x short barreled 12 pdrs. Four or the short barreled 12 pdrs were missing one of the rests that sit on the gun carriage.These had to be replaced with plastic of the right diameter from my spare parts box.
 Over 20 hours of work later the assembled 728 parts that make up the formidable 104 gun battery are pictured below.

The guns have now been boxed up, prior to spraying and additional detailing.

Tuesday, 29 November 2011

Model of Hms Fearless


Recently I was given an opportunity to make a model of Hms Fearless for a Marine who served  upon her in the eighties. 
I first made the Airfix 1:600 scale model over 30 years ago. I remember comparing the wonderful The Roy Cross Artwork on the box to my finished model and being left feeling somewhat disappointed; if only it had windows on the bridge, people, railings around the edges, and guns that looked like they were made of something harder than Plasticine.

Well this time I wanted to capture some of that box art animation and see just how good I could get this nearly 50 year old model to look. 300+ hours later, I have finally finished and I am quite happy with the result.
The old Airfix kits are still some of the only small scale options for many Royal Navy ships of the Falklands era, and can be polished up quite nicely if you have plenty of time, effort and put in the research.

I have just noticed that it seems L'Arsenal have released a 1:700 resin model of Hms Fearless as she was in 1982, retailing at 80 euros;
www.larsenal.com/Source/catalogue/larsenal/ac70015a.jpg

From what I could see on there website the model looks really nice, crisply cast and a vast improvement on the old Airfix kit.

If I make another Fearless I think I would choose this version despite 1:700 being a less impressive scale. It will open up some interesting diorama possibilities in the 1:700 scale; Dragon Hms Invincible, White Ensigns type 22's batch 1's or the Dragon type 42's, Orange Hobby's Hms Ocean.

Some initial observations of the L'Arsenal kit,  the LCVP's are wrong for the Falklands 1982: see Foxtrot 7 memorial at Portsmouth dockyard ;
  www.memorials.inportsmouth.co.uk/rm-museum/landing-craft.htm

Also some of the seacat directors appear to be missing? as are the life raft canisters unless they are flat etched brass?  I am not sure about the shape of a few things including the LCUs  but still looks like the best small scale version of Hms Fearless available.


 After this time consuming project I have promised myself the next build I will undertake will be something modern and straight out of the box with no conversion required, maybe the new resin Orange Hobby 1:700 Hms Ocean or the new Airfix 1:350 HMS Daring when it is released.

The brass etchings for Hms Fearless were supplied by White Ensign Models as were the resin Seacat launchers(which seem maybe a little too big?) and MkVII bofors guns.  Various bits and bobs were scavenged from other Airfix , Dragon, Skywave kits.


I was asked to make her as she appeared in the mid eighties on exercise in Scandinavian waters, the landing craft were painted in the black and white disruptive camouflage pattern that they used in the Falklands( I believe Intrepid's were green and black in the conflict). Was this pattern was ever used for Fearless LCU's after the Falklands? I don't know for sure, but it makes for a more interesting model even if strictly speaking it is a pastiche of how she looked between '82-'86.(in mid '86 Fearless was put into reserve until she undertook an extensive refit, not to return to active service until  late 1990).

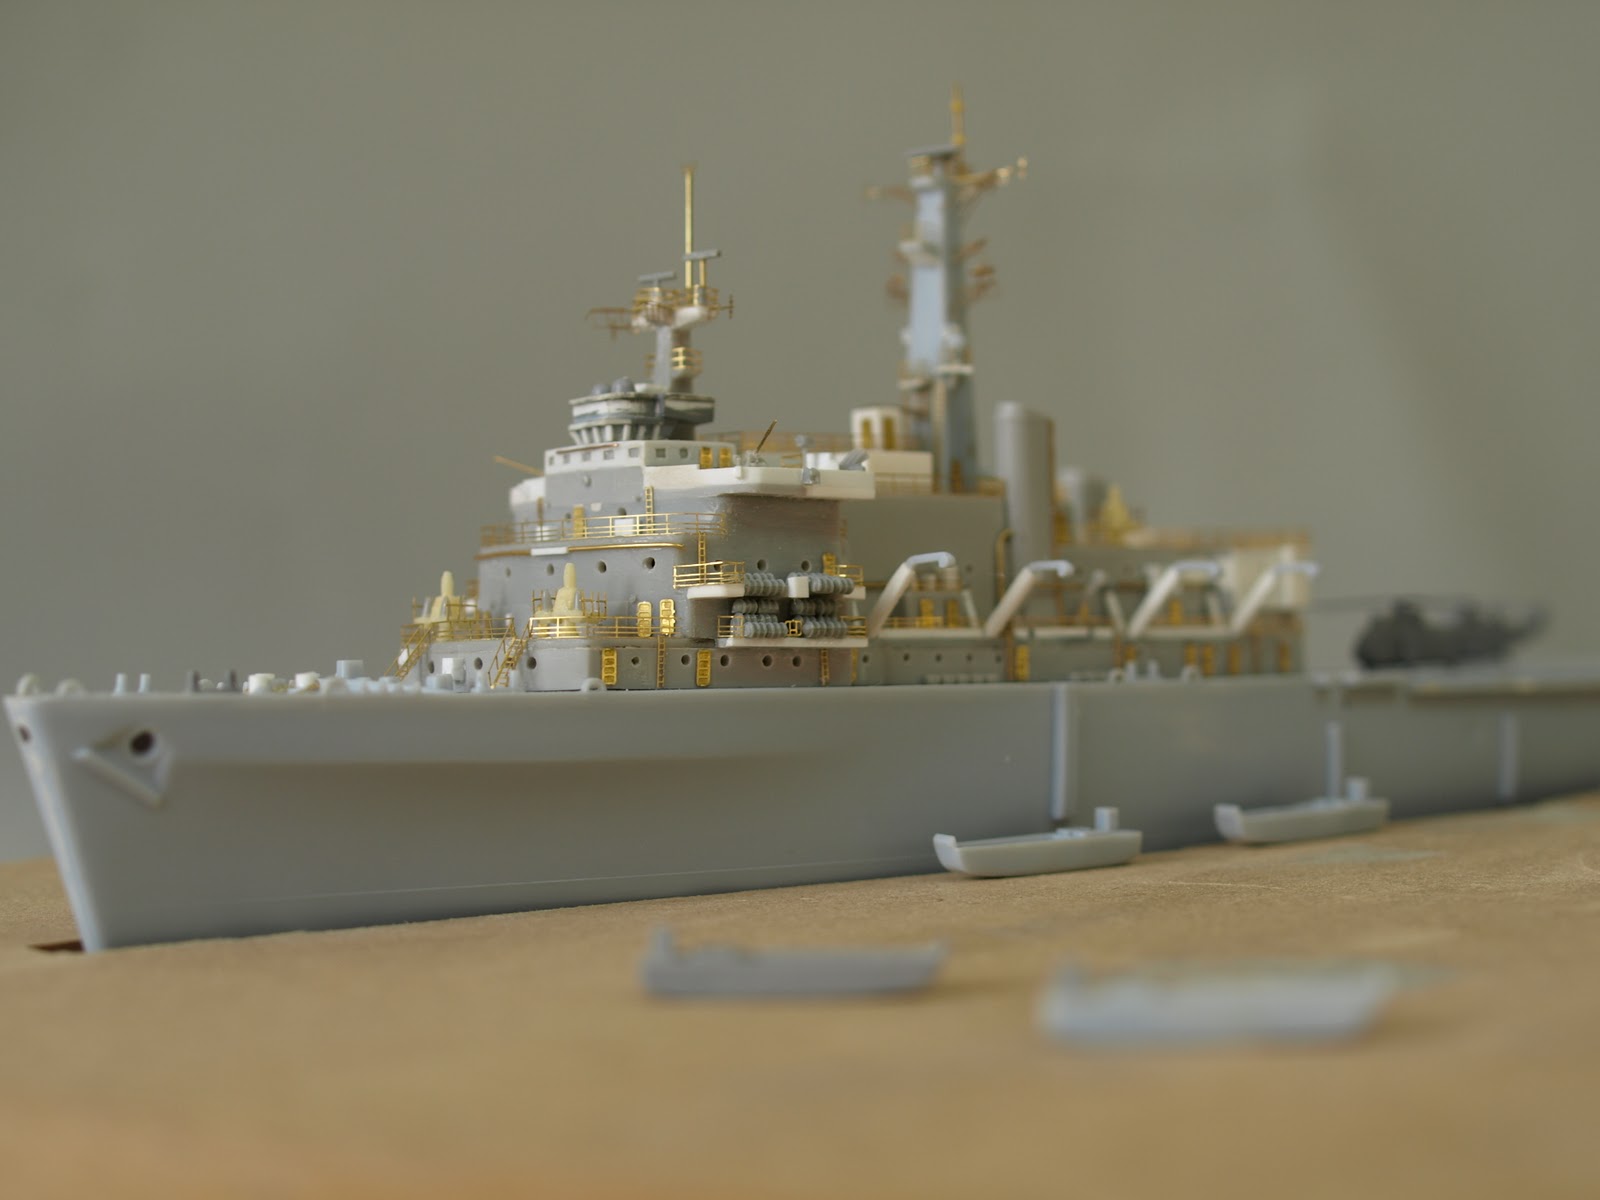
To make the ship as she appeared between 1982-86 the superstructure needed considerable modification. The Airfix kit represents the ship as she appeared in the 1960's, in the photo's shown below you can to see where this modification was necessary,particularly in the ones taken before paint was applied.

 The rigging was made from Lycra ( again from White Ensign Models), and was based on various photos and although it is simplified adds greatly to the general feel of the model as shown below.

A good view of the scratch built Flyco and radar domes added to the main mast.
A one pound coin to show the size of this model,1:600 scale. I find Photos are a useful quality control  tool . Looking at the model larger than life enables you to hone your work; note the deck supports below the  life raft canisters and just to the rear and above the L10, the rear three ones were later changed to match the front three exactly, a difference of less than 0.5mm.


If the ship were to be portrayed as she was in the Falklands, serial numbers on hull and insignia on funnels would be painted out, the zebra striped Seaking would also be removed and replaced with another green "Jungly" Seaking or a Wessex helicopter. Also "ad hoc" GPM  positions would be added in sandbags on superstructure.


Close up from the sharp end, showing reworked davits having lowered or lowering LCVP's. Each of the port LCVP's are carrying about 30 marines.Figures are from Gold medal. Also notice the Seacat launchers complete with white missiles in place.

Two Squads of marines head towards the Seakings, flight crew with yellow/red /green jackets standby or lead the marines. The Seakings were scratch built, some 1:600 white metal helicopters are available but were deemed too "chunky" and out of scale for this model. Volvo BV206's in the LCU's were also scratch built.
The kit sunk in its MDF base board, various layouts of landing crafts were tried before the final configuration was settled upon

The white areas give a clear view of how much of  plasticard was required to bring this kit up to date, rebuilt flyco,cranes,davits,deck edges, porta cabins,etc.

 The bridge required almost a complete rebuild,decks around bofors guns extended,decks for life raft canisters replaced etc ,etc ,etc !

A  photo of a real Seacat launcher from HMS Cavalier at Chatham Dockyard, helped with the detailing 

And a photo of a real MK VII Bofors gun again from Hms Cavalier,Chatham.
Research was very time consuming on this project, but I must say a lot of fun. My one regret is I did not purchase one of the scale plans/drawings from Jecobin, might have saved me some time,even though the plans are of her as she appeared after the '86 refit.
 The internet  provided lots of photos but often they are not of sufficient resolution to be of much use. The two best books I found  for the modelmaker were"Fearless and Intrepid 1965-2002" by Neil McCart, lots of photos of good quality and "Hms Fearless The Mighty Lion" by Ewen Southby-Tailyour the photo's in this one are often quite grainy but still a useful resource.
 A close up of the bridge, clearly showing the MkVII bofors guns and the Seacat  missile launchers.
Also shows the ships badge,crew and rigging.

A good close up of the Davits and rear of the superstructure,crane,embarkation ladder etc

Again another close up of the front of the superstructure, the figures are just under 3mm tall, note the anti-flash gear on the Bofors gunners ! Also the rebuilt decks for the life raft canisters pinched from the 1:700 Dragon HMS Invincible

Above the Model in the bespoke built Oak case complete with name plate. The ship is 10.5" long, the case is just over 20" long. This small scale (1:600)  is ideally suited to dioramas with several ships, however single ships can work well when portrayed imaginatively.
 It is only when these models are finished to the extremely high level of detail, accuracy and quality as  illustrated here, do they become rare, sought after and collectible. 


Indeed  in my opinion they transcend being merely a model and become a work of Art that is both evocative,emotive and informative.

A close up of two LCU's cutting through the water, this photo shows clearly the additional detailing with brass etchings.Scorpion tank and a Bedford truck make up the cargo.
Another arty shot showing one of four LCU's about to dock, complete with a 3mm high crew man helping to guide the landing craft in .
Detail of the LCVP's showing the cargo of Royal Marines, note also the brass etched anchor chain, and the reworked anchor(the original is massively out of scale). Weathering was kept to a minimum but shows most clearly around the anchor area.

Details of the Flight/Vehicle Deck, shows clearly the Marines heading towards the Seakings, life Raft canisters where placed on brass etched canister holders from White Ensign models 1:700 Type 23 etching set, several sheets were required.
Radio masts were made of thin brass rod, water effect looks particularly good in this shot.