Marine Art and Maritime Modelmaking

Welcome to my blog, it's primary intention is to keep my existing clients up to date with the progress of their commissions, but hopefully it will prove of interest to anyone with an interest in Marine art and modelmaking
Showing posts with label building Hms Victory. Show all posts

Thursday, 6 November 2014

Hms Victory purchase made to improve the kit

Update on a few Purchase made and a few I plan to make shortly. 
A while back I bought these rolls of copper to place over the keel.

They are self adhesive and very very thin, they came in at about £9.00 a roll. I will detail how their application went in future posts.

I also got 100 tiny yellow LED lights to light up the inside of the ship (cost about £7.00 from ebay) I will experiment with painting them to appear like  the lamps used.

Here a close up to show just how small they are
Here a photo of the lamps  to copy
I haveI also come across some wonderful   paper thin wooden decks costing about £70.00 from 
scale decks.com

 Other extras for super detailing the cannons on the upper decks have been sourced, and will be ordered when required.

Tuesday, 4 November 2014

HMS Victory, Airfix 1/100 additional research

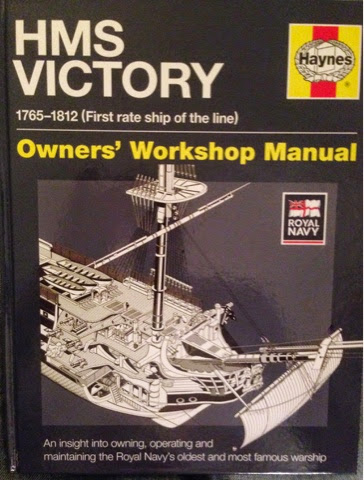
 The instructions that come with this kit need to be treated with a healthy sceptisim, had to call in some back up with this publication below

Loads of photos and information in this book that helps to cut through some of the contradictions and uncertainties  faced when building this kit.
For example the Airfix /Heller  instructions suggest that the internal  walls on the gun decks are painted red ?
 I know the gun deck walls on the ship today are white  but were they painted red in 1805 ?
Well apparently not, they were white washed according to this publication and as I plan on lighting the ship inside small amounts of the wall may be visible.

I have  also learnt that you can not take the ship as she is today as a completely accurate representation of how she looked in 1805.
For example the yellow ochre colour she is  currently painted is not correct,according to the latest research by Micheal Crick-Smith. The yellow should be a weaker paler colour than the present vivid shade.
Also  according to the Crick-Smith's analysis of the hull, In 1805 the Orlop deck was painted a pale stone/cream colour while the surgeon's and other small cabins were painted in two shades of blue.

Tuesday, 22 July 2014

HMS Victory, Airfix 1/100, the boats

Started looking at the ships boats


The instructions suggest an all white paint with a green stripe paint scheme.

The three boats were cut off the sprues and the insides painted white with a brush prior to assembly leaving the edges to be glued unpainted.
The halves of the boats need some encouragement to join together, in particular the Dingy.

Then some sanding of the joint lines, 
The rudders were added and the boats put away for painting and super detailing at a later stage.

Tuesday, 28 May 2013

HMS Victory, Airfix 1:100, painting the stern

Below the paintwork on the stern is all but complete
Some final tidying up maybe made when the ship is assembled and washes of acrylic will be added.
Above a detailed shot of the crest on stern, all painted with enamels. These paints are a little tricky to use for detailed work, and need to be thinned to just the right consistency to flow easily.

This photo shows  an earlier stage with the yellow and black nearly completed , just a little snagging required. I used the humrol enamels that came with the kit , spayed on the yellow over a natural wood colour undercoat.Then a diluted black enamel was hand painted over the yellow. It took me 10 hours to get to this stage.


Above shows a close up,it's really tricky getting the finish right on this part of the ship. It's got to be clean cut paintwork at this scale.

Tuesday, 14 May 2013

HMS Victory, Airfix 1:100, alterations worth making to the kit, gun ports etc

In my opinion the most important alteration you can make to this kit is to thicken the hull walls around the gun ports. The injection molding process/ financial restrictions mean the ships hull is considerably thinner than it should be.
So using some styrene strip of 3.2mm x 4 mm for the lower gun deck, 2.5mm x 4mm for the next and 2mm x 4 mm for the upper gun deck, I set about thickening the hull
First of all the gun ports were sanded down to remove the poorly represented inner frames, then using a guillotine/cutter the styrene strip was cut into 8-9mm lengths and glued on the inside of the gun ports.I then  adjusted the strips looking from the outside,  positioning each piece, making sure they overlaped evenly and parallel to the edges of the gun port.
Below, 13 hours and 352 pieces of styrene later all the gun ports on both sides of the hull have been completed.


A close up shows how the hull walls now appear convincingly deeper when seen through the gun ports.

This shot shows the hulls from the inside, none of the styrene will be visible when the decks are in position, except for maybe the middle ports on the 12pdr gun deck, theses ports may need  to be hidden by a  thin sheet of styrene after the lower decks have been put in place.
The next alteration made to this kit was to prepare the keel for the copper covering. The bottom part of the central keel is cast flat with no detail.This part of the ship is not really seen when viewing the ship from above, but if viewed from a lower angle it can be seen.
 One complete packet of styrene strip 4 mm x 0.25 mm was cut into lengths between 12-15 mm long.The flat part of the keel was tiled with this so that it appeared uniform. This took 3 hours and 15 minutes for both halves of the hull, leaving it ready for the next stage, covering in copper foil.


 The next task was to deal with the moulded wood grain on the outside of the hull. Initially I thought I would leave it ,but after some contemplation, I decided the out of scale wood grain effect upon it  would really detract from the overall look of the finished model.
The only reason I could think of for not removing the wood grain effect was that is was a time consuming, boring, messy, laborious task that I didnt really want to do.

 With this in mind, armed with a piece of 180 sandpaper I decided to take on the dreaded laminate floor style wood grain.
On the left of the stairs the wood grain as it was originally, on the right of the stairs the rubbed down hull. The result is pleasing, but great effort was required not to remove any detail around the gun ports or other sharp edges that I wanted to keep.
After 8.5 hours both sides of the hull were rubbed down to an extent where the wood grain effect exists only as a light shadow. The seam lines on the top of the hull were also removed with a scalpel and sand paper.

The last major alteration to the hull I have planned is concerning the windows in the stern of the ship.The glazing bars in the windows look cheap like UVPC, not suitable for Georgian glass so with a small square needle file the windows had their bars filed down to make them thinner.

The three  columns of windows on the left hand side of the picture have been filed down, compare them with the other windows which are untouched. The thinner rubbed down glazing bars have a delicacy and irregularity that adds greatly to the appearance of the model.

I was going to cut the rear gun ports out, but unfortunately the holes do not line up with the lower deck, they appear to be position lower than they should be ? So making the necessary alterations would become quite time consuming job and are not in the budget for this project.

The windows at the side of the stern were also given the same treatment.The half on the left has been filed down and awaits cleaning up,the half on the right is as it comes in the box. This photo shows clearly shows how over sized the glazing bars are.

Below the photo shows the stern cleaned up and ready for painting.

The windows were cleaned by running the edge of a scalpel along the glazing bars to remove the "fluffy bits" ,then they were brushed with a stiff brush to get rid of any bits, leaving a finer and  increasingly delicate looking stern.

Tuesday, 13 December 2011

HMS VICTORY Airfix 1:100

I have started looking at the build of HMS Victory,  by Airfix,(ex Heller) 1:100 scale, both sides of the hull are crisply cast with good detail. In this scale the hull alone is about 2 feet long.
 One of the first jobs has been to get an estimate for a display case which will be essential to protect the model during and after construction.
For an oak framed case, with toughened safety glass, the cost including delivery is around the £800.00 .
I use Timbercraft Cabinet Displays of  Towcester for my work, although they are not the cheapest, they are good quality cases;  www.displaycases.co.uk

I feel this is an absolutely essential investment for a project of this size and quality.
 Secondly the plastic Vac form sails that come with this kit will be replaced with linen sails at a cost of about £100.00, as will some of the kits rope/thread for that of a superior quality.


One the most obvious flaws in this kit is the thickness of the injection moulded hull. When you look at the gun ports you can see the walls of the ship are not thick enough.


The Styrene strip below will be fixed around the inside of the gun ports,  making the walls of the ship look much thicker, the thickest strips are for the lower deck, the thinnest for the upper deck, the quarter decks are left as they are.